How To Draw a Slice of Pizza
Hey art fans, in this online drawing guide you will learn how to draw a cartoon pizza slice step by step. It's simple to follow and easy enough for children as young as five to enjoy. Making pizza illustrations is tons of fun because you can choose your favourite toppings to draw and colour in. We've also made a YouTube video for you to watch too! Check it out below...
Art materials needed:
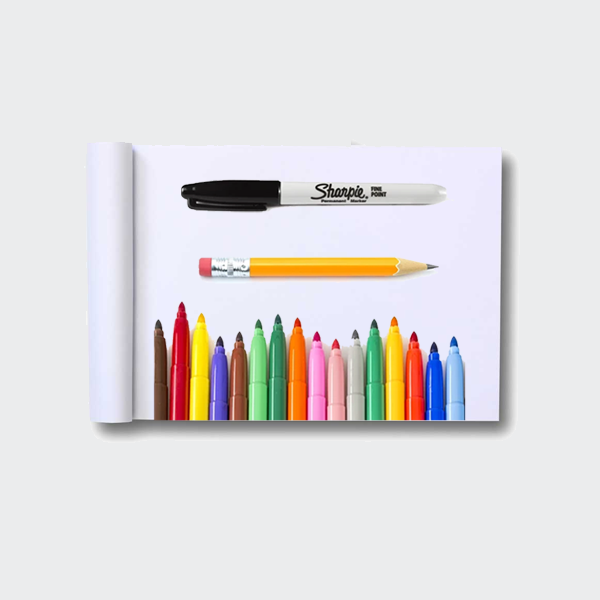
A plain sketchpad to draw on, a sharp pencil to draw with, an eraser to rub out messy lines, a black marker pen to go over pencil lines, and a bunch of colouring pencils or felt tip pens to add a splash of colour!
Step 1: Drawing with pencil
-
What’s cooking, art fans?
In today's episode of Quickdraw we will be drawing a delicious slice of pizza.
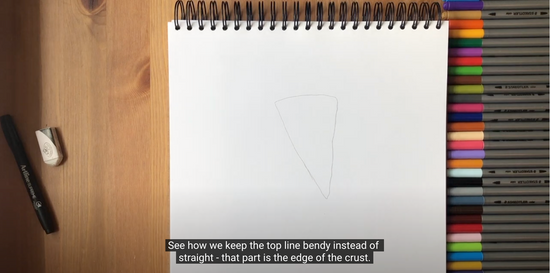
The golden rule when drawing a pizza is: a circle for the whole pizza or a triangle for a single slice. Like this.
-
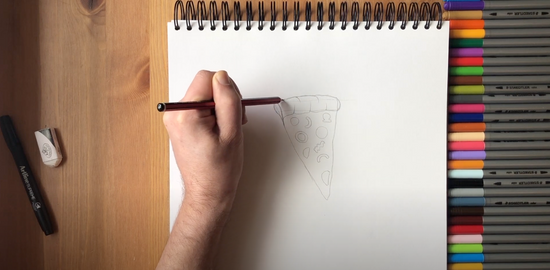
The less perfect, the better.
See how we keep the top line bendy instead of straight - that part is the edge of the crust.
Then just a tad lower down, add another line across, so we have a nice, thick crust separate from the cheese and toppings.
Maybe some extra roundedness on the crust either side for a realistic touch.
Hey, what toppings do you love? Let’s slap some chunks of pepperoni on there to start.
You can’t beat a classic!
From here on out, you design the rest of your pizza! Add whichever cuttings of meat, fruit and veg you want as your special, signature recipe.
Or watch what we draw and copy!
Some funny looking shapes now, this can be peppers, or mushrooms, and even red onion. All of these ingredients can be spaced out or close together on your pizza.
Some minor detail on the crust, with a few curvy lines to make it look extra puffy and round.
-

Oh, here’s a fun part - drawing sloppy, melted cheese dripping from the pizza edge. Who doesn’t love that bit!
Long and short droplets attached to the main slice, like this. Running all down one side.
Step 2: Drawing with pen
-

Ink, ink, ink! Grab your black marker pen and trace around those old pencil lines.
This is the part where your very own yummy pizza creation starts to look real.
Hey, whilst you’re doing such an excellent job on your artwork here’s a fun joke about pizza to share with your friends…
What did the pepperoni say to the cheese? “Slice to meat you!”
Oh boy, such a cheesy joke, haha.
Alright, looking good enough to eat. Fetch your eraser and rub out those pencil lines if they are showing under the black marker.
Step 3: Colouring in
-
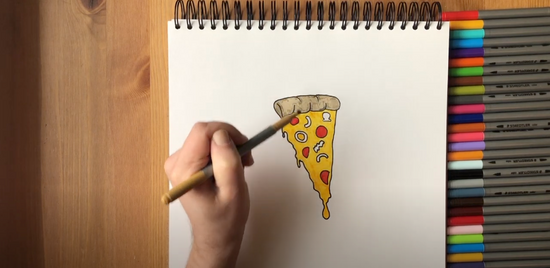
Now, for the final part of the recipe - a dash of colour for the pizza toppings.
Choose a few bright colours.
The main area, which is around those cool shapes you’ve drawn, is going to be the cheese layer and we can colour this in yellow. Orange or red is also good.
Get your yellow right in those tiny corners, for every melted drop.
Ok, time for some cool pizza trivia…
Did you know that the first pizzas were made in Italy hundreds and hundreds of years ago? And they were square, not round. Huh.
Since then, pizzas have been popular all over the world and some countries have their own wacky cooking methods. In Japan, they have fish as a main topping.
And in Scotland, you can even order a deep fried pizza! How bizarre.
Once you’ve finished the yellow cheese layer, start on the toppings or crust.
Here’s a few helpful tips…
The crust can be orange or brown.
Peppers are usually red or green.
Red onion, strangely enough, is purple.
Mushrooms are whote or brown.
Don’t forget, you can watch more art tutorials at the Quickdraw channel, including videos on how to draw animals, objects, cartoon characters and even buildings.
Oh wow, now check that out… what a work of art. That’s some great drawing guys, great job.
More food drawing ideas right here...
Try an online art tutorial
Ready for more easy drawing ideas? Try one of Quickdraw's art tutorials and raise your sketching and colouring in skills to expert level!
