How To Draw a Tractor
Sketch and colour in your very own cartoon countryside tractor artwork, step by step. This drawing idea is suitable for children aged 5+ and beginners. Follow these tips to get started..!
- 6 easy to follow steps
- Video tutorial and drawing guides
- Beginner skill level
- Pencil, marker pen and coloured pens / pencils needed
Watch the video tutorial
This video of how to draw Sonic the Hedgehog takes less than 10 minutes to watch. From start to finish, a friendly voiceover explains what parts to draw and why. Click the play button below to get started!

Follow the step by step guide
Sketching and colouring in a cartoon tractor is easy when there are clear instructions. So don't worry, Quickdraw has you covered! Scroll down to start your amazing artwork!
-

1. draw the tractor wheels
Hello friends, let’s draw a country tractor. Start your engines!
Starting with the back wheel, which is ginormous compared to a regular car or even a race car. The inner circle gives the tractor wheel a rim. Mark a dot in the centre if that helps you.
Then over to the front wheel, and to join these two tractor parts together we need a straight line. This line is the bottom of the tractor cabin where the door will be.
Our front wheel has the same thickness rim as the larger one.
Our drawing is looking like a pair of goggles but wait for it…

-

2. draw the front and back panels
Now we can begin to build the rest of the tractor with some front panels, a rear mudguard, and the cabin itself where the farmer (or whoever is ploughing the field that day) will sit up high.
Drawing tractors is very simple really. Once you have the wheels the rest comes easy.

-

3. draw the windows and roof
Let's sketch out the roof of our tractor vehicle, see how it overhangs the window area. This is a strong part of the tractor because it holds the windows in place.
See how we’ve also drawn an inner line to create a large and small window - that’s a neat trick.

-

4. add the inside parts of the tractor cabin
The final details to come now, with a set of steps for the driver to climb up from, and then inside the tractor’s cabin, the outline of a steering wheel and chair. Looking comfy!

-

5. trace over the pencil with marker pen
Folks, we’re now moving on to step two of our cartoon tractor drawing tutorial which involves just one piece of art kit: a black marker pen.
If you don’t have a marker, don’t fret… just plough right along to the final stage of colouring in.
Use your black marker pen to trace over the pencil lines of your tractor sketch.
The outcome of this should be a nice, smooth outline.
Hey, how about a great joke to share with your friends..?
Here goes. A friend asked me if I had seen the film "Tractor". "No", I replied, "but I've seen the trailer". Haha, hilarious don’t you think?!

-

6. colouring in
Ok guys, final part now. Grab your colouring in pencils or felt tip pens. You only need a few of either.
The only rules to go by when colouring in your tractor drawing are:
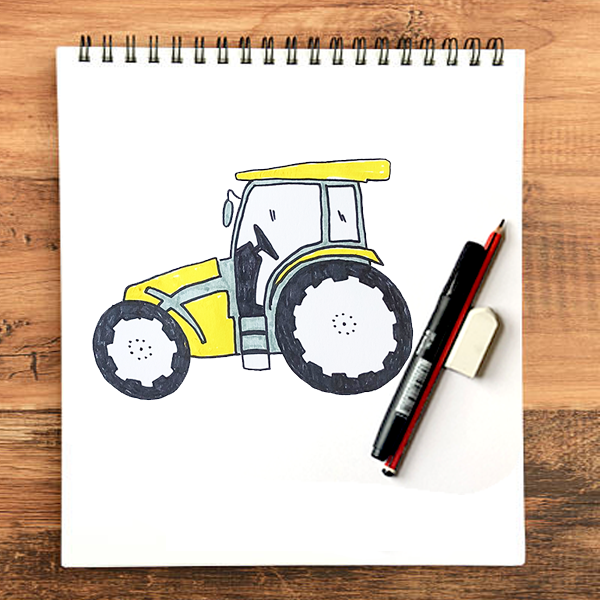
Keep the wheels and the parts of this farmyard vehicle around them black or grey. This suggests that they are made from rubber or metal.
But as for the rest of the tractor, any colours are great - we are using a bright yellow because this will stand out well on the field of crops.
Tractors can also be green, red, orange or blue.
You’re doing amazing so far.
And that’s a wrap… fantastic job guys, and thanks for taking part in this short drawing exercise. If you like what you watched today don’t forget to share this idea with your friends, or even your art teacher at school.
And check out Quickdraw’s other drawing ideas on this channel too!


